Monday, April 08, 2019

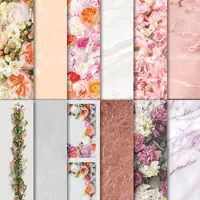
Stampin' Up! Petal Promenade Designer Series Paper

  • Stampin' Up! Petal Promenade Designer Series Paper
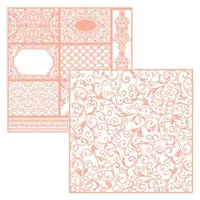
  • Beautifully Detailed Laser-Cut Specialty Paper
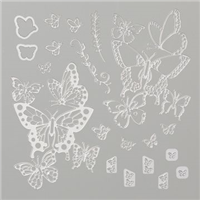
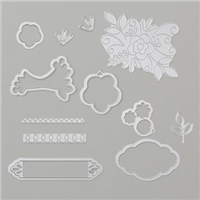
  • Butterfly Beauty Thinlit Dies

Stampin' Up! Laser-Cut Specialty Paper

Pairing yet another Designer Series Paper with Lase-Cut Paper- and Die cuts add a soft, feminine feel to this card.  Again using the Beautifully Detailed Laser-Cut Specialty Paper Pack.  Today I'm also showcasing the Petal Promenade Designer Series Paper and one of the butterflies from the Butterfly Beauty Thinlit Dies set.  Although the Butterflies in the die set are connected, I chose to use just one of the connected set and found it easy to separate from the entire, large set.  The Petal Promenade Designer Series Paper is featured in the  Stampin' Up! annual catalog.   


The basecard for today's card is Fresh Fig.  Then I added a layer of Petal Promenade Designer Series Paper.  Then I attached the white side of one of the designs from the Beautifully Detailed Laser-Cut Specialty Paper.  To adhere this delicate laser-cut layer I placed, as I've explained in earlier posts, the laser-cut paper on my silicone craft sheet, added glue to a sponge, and then --without moving the Laser-cut paper-- sponged glue to the back side.  Then I added it to the card front  This technique is easier than trying to add glue runner to the back side of the delicate laser-cut paper and it is easier than than trying to add glue to these delicate cut pieces.      


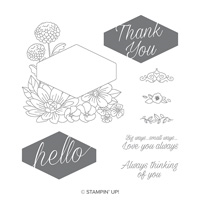
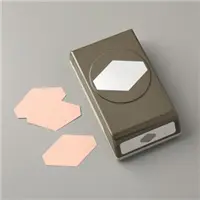
The sentiment is from the Accented Blooms Stamp Set and it is stamped on Whisper White using Fresh Fig ink.  Then punched out using the Tailored Tag punch. 

The White butterfly is two layer of Whisper White die cut using one of the dies from the Butterfly Beauty Thinlits Dies.               


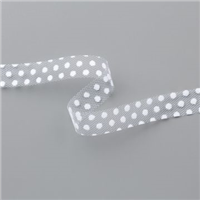
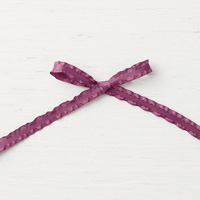
When I added the tulle ribbon, I found it didn't show up well against the laser-cut paper, so I first added a layer of Fresh Fig 3/8 Mini Ruffled Ribbon.  However, I could have just added a small strip of Fresh Fig cardstock, but the ribbon was already cut, so I used that.  In the photo above, you can see the other sentiment available in the Accented Blooms stamp set.  You'll want to get the coordinating Tailored Tag Punch when you purchase this stamp set. 

With Easter, Passover, Mother's Day, and graduations coming up.  This is a great card to create to thank those who invited you or remembered you.  For more ideas for using Petal Promenade Designer Series Paper, check out the tutorials on my Tutorial tab.

Recipe


  • Stamps: Accented Blooms (146681)
  • Ink:  Fresh Fig
  • Paper: Fresh Fig, Whisper White, Petal Promenade Designer Series Paper,  Beautifully Detailed Laser-Cut Specialty Paper (148812) 
  • Accessories:  Butterfly Beauty Thinlit Dies, (148536), Tailored Tag Punch (145667), 5/8" Polka Dot Tulle Ribbon (146912), Fresh Fig Mini Ruffled Ribbon (146945), Big Shot, Silicon Craft Sheet, Multipurpose Glue, Dimensionals, Mini Stampin' Dimensionals,

To order items used on today's card, click one of the product photos below, or go directly to my Stampin' Up! store.

Price: $110.00

 Place Order Here


Want more motivation for creating cards?  Join my Meetup Site and you'll receive notification of my upcoming classes.  


Enjoy!


Donna Ross
Stampin' Up! Independent Demonstrator
Private Classes for 1 or a small group of friends:  http://cardmaking.meetup.com/71/
To place an order: Place an on-line order through my Stampin' Up! store - 24/7 Shopping 


Thursday, April 04, 2019

More Beautifully Detailed Laser-Cut Specialty Paper

  • Beautifully Detailed Laser-Cut Specialty Paper
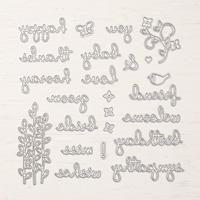
  • Well Written Framelits Dies create beautiful sentiments

Stampin' Up! Laser-Cut Specialty Paper

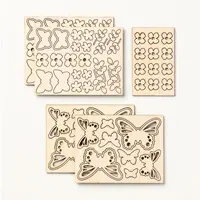
I'm still amazed by how many Laser-Cut designs are included in the Beautifully Detailed Laser-Cut Specialty Paper Pack.  Today I'm pairing the Petal Pink Laser-Cut design with Crumb Cake paper and the wooden Butterfly Elements many of you acquired during Sale-A-Bration.  I colored my wooden Butterfly Elements by sponging Crumb Cake ink onto the wooden surface.   The specialty Laser Cut Paper is Petal Pink on one side and white on the other side.  And I love that there are 4 sheets of 2 different designs -- 8 sheets total.  I grabbed several packages of both the Stampin' Up! Laser-Cut Specialty Paper and the Petal Promenade Designer Series Paper when they were offered as free Sale-A-Bration selections last month, but you can purchase both of these items from the Stampin' Up! annual catalog. I'm casing this card from the very talented  Linda Dalke from Australia.  


The basecard for today's card is Crumb Cake.  Then I attached the Petal Pink Beautifully Detailed Laser-Cut Specialty Paper.  To adhere this delicate laser-cut layer I placed the laser-cut paper on my silicone craft sheet, added glue to a sponge, and then --without moving the Laser-cut paper-- sponged ink to the back side.  Then I added it to the card front.      


The sentiment is die cut from Copper Foil Sheet using the Well Written Framelits.  The sentiment label is die cut using one of the Needlepoint Elements Framelits Dies. As I mentioned earlier, the wooden Butterfly Elements was sponged with Crumb Cake ink to stand out better from the background.               


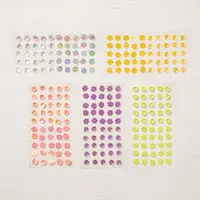
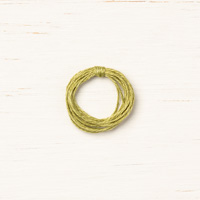
The wooden Butterfly Elements is topped with a double bow made from the Old Olive Linen thread, and the center includes an adhesive-backed Grapefruit Grove Gingham Gala Sequins.  The are several sentiments that can be substituted for the one used on these cards.  The well-written Framelits Dies includes 14 different words, and works with the Well Said stamp set. .  You'll love personalizing the design to meet your needs.  Think how happy you would make someone's if they received this beautiful card from you.  

Recipe


  • Stamps: None
  • Ink:  None
  • Paper: Crumb Cake, Petal Pink, Beautifully Detailed Laser-Cut Specialty Paper (148812) 
  • Accessories:  Gingham Gala Adhesive-Backed Sequins (148561), Butterfly Elements (149711)Only available during Sale-A-Bration, Needlepoint Elements Framelits Dies (148541), Well Written Framelits Dies (148534) Old Olive Linen Thread (148811), Big Shot, Dimensionals

 Place Order Here


Want more motivation for creating cards?  Join my Meetup Site and you'll receive notification of my upcoming classes.  


Enjoy!


Donna Ross
Stampin' Up! Independent Demonstrator
Private Classes for 1 or a small group of friends:  http://cardmaking.meetup.com/71/
To place an order: Place an on-line order through my Stampin' Up! store - 24/7 Shopping 
Current Promotions
Start You Own Business
Host a workshop
Download Free Stampin' Up! Catalogs


Wednesday, April 03, 2019

Beautifully Detailed Laser Cut Specialty Paper

  • Beautifully Detailed Laser-Cut Specialty Paper
  • Storage by Stampin' Up! Questions & Answers

Stampin' Up! Laser-Cut Specialty Paper

I so happy when I find products form the annual catalog that work with items from other catalogs, specifically, the current Occasions Catalog.  Today I paired the Beautifully Detailed Laser-Cut Specialty Paper with one of my all-time favorite paper packs, the Petal Promenade Designer Series Paper.  The specialty Laser Cut Paper is Petal Pink on one side and white on the other side.  And I love that there are 4 sheets of 2 different designs -- 8 sheets total, which means I can make multiple cards using these laser-cut papers.  You'll love the delicate looks you'll create with this lovely Specialty Paper.   


The basecard for today's card is Petal Pink.  Then a layer of Mossy Meadow.  The I die cut a rectangle so the stitching highlights the Laser-Cut Design.  On the opposite side, I added a piece of Petal Promenade Designer Series Paper.      


The sentiment is stamped in Mossy Meadow.  I tried it on both Very Vanilla and on Whisper White to see which I preferred. You can see both sentiments below.  I'm still not sure which I like better.  The sentiment uses the Label Me Pretty Stamp Set.  The two images are stamped individually and then punched out using the Pretty Label Punch and the center is punched out using a 1-1/4" circle punch.               


The ribbon at the bottom of the card is tied in a double bow.  It is the Petal Pink/Whisper White 5/8" Variegated Ribbon from the Occasions catalog.  This ribbon is currently out of stock but it is expected to be back in stock by April 15 so you can add it to your order and it will ship to you separately as soon as it arrives.  This card can be dressed up or dress down based on the sentiment you choose to add.  Send someone a card you've hand made today to let them know how special they are to you. 


Recipe


  • Stamps: Label Me Pretty (143861)
  • Ink:  Mossy Meadow
  • Paper:  Petal Pink, Whisper White,Very Vanilla, Mossy Meadow, Petal Promenade Designer Series Paper (146913) Beautifully Detailed Laser-Cut Specialty Paper (148812)
  • Accessories:  Rectangle Stitched Framelits Dies (148551), Petal Pink/Whisper White 5/8" Variegated Ribbon (148776), Pretty Label Punch (143715), 1/4" Circle Punch (119861) Big Shot, Dimensionals

Questions & Answers about Storage by Stampin' Up!


Your Space, Your Way.

Stampin' Up! just launched Storage by Stampin' Up!.  And now you can design your stamping storage space any way you want using the modular storage solutions that lets you customize and organize your space your way.


Storage by Stampin' Up! Q & As

Q.  Will old design Stampin' Pads fit in the Ink Pad & Marker Storage Tray
A.  No.  The Ink Pad & Marker Storage Trays are designed to fit the new-design Stampin' Pads only

Q.  How high can I stack storage trays?
A.  We stacked up to 50 storage trays without any issues.  BUT we would not recommend stacking that high.  While our Storage by Stampin' Up! products are sturdy, the higher you stack them, the less stable they'll become.  Use your discretion when stacking

Q.  Can I mount my Storage by Stampin' Up! products on the wall?
A.  Our modular storage products are designed to sit on a table (or similar flat surface)

Q.  How should I use the Open Storage Cube?
A.  The Open Storage Cube can be used to hold any miscellaneous items like ribbon, embellishments, and small punches.  For more inspiration on ways to use items from our Storage by Stampin' Up! product line, check out the configuration chart we created, below.

Q.  Can I mix and match Storage by Stampin' Up! products?
A.  Yes!  Our Storage by Stampin' Up! products are modular and designed with customization in mind.  Take a look at the dimensions on my online store for each item in our new modular storage product line.

Q.  Do I need a Storage Lid for each 5-tray stack?
A.  No.  The Storage Lid covers the top of Ink Pad & Marker Storage Trays,  Stampin' Blends Storage Trays, and Open Storage Cubes, so you need only one per storage configuration.

Q.  Are Storage by Stampin' Up! products free-standing or stacked?
A.  Both.  We designed these modular storage products to be free-standing and stackable, so you can customize your crafting space to work best for you.

Q.  Will there be expansions to the Storage by Stampin' Up! product line in the future?
A.  Like all of our product offerings, we hope Storage by Stampin' Up! will be successful and expand.  However, at this point in time, we can't guarantee any additional modular storage products in the future.

A.  Are there any Storage by Stampin' Up! bundles available?
A.  We are not currently offering any bundles for items from our Storage by Stampin' Up! product line.  If you're looking for examples on how to mix and match our storage pieces together, please take a look at the configuration chart we put together and provided for download, below.

A.  How many Stampin' Ink Refills can I store in the Storage Topper?
A.  You can store up to 20 Stampin' Ink Refills (or other small items) in the Storage Topper.

Q.  Are ink pads difficult to remove from Ink Pad & Marker Storage Trays?
A.  No When you insert an ink pad into a storage tray, a small portion of the ink pad will stick out.  We designed it that way, so your ink pads will be both secure and easy to access.

Q.  Can I buy individual Ink Pad & Marker Storage Trays and/or Stampin' Blends Storage Trays?
A.  No  Both of these items include a set of five white plastic trays.  Please use the configuration chart, below, to determine how many storage units you need.

Q.  What material do you use to make Storage by Stampin' Up! products?
A.  Our modular storage products are made with white, acrylonitrile butadiene styrene (ABS) plastic, which is a lightweight and durable material.

Q.  How do the silicone feet work?
A.  To protect your surface and prevent slipping, we're including peel-and-stick silicone feet with the Ink Pad & Marker Storage Trays, Stampin' Blends Storage Trays, and Open Storage Cube.

Read more about this new storage product line in my earlier post.

Then download this configuration chart to plan the storage solutions that work best for your space, and give your stamping products a beautiful new home.


 Place Order Here


Want more motivation for creating cards?  Join my Meetup Site and you'll receive notification of my upcoming classes.


Enjoy!


Donna Ross
Stampin' Up! Independent Demonstrator
Private Classes for 1 or a small group of friends:  http://cardmaking.meetup.com/71/
To place an order: Place an on-line order through my Stampin' Up! store - 24/7 Shopping 
Current Promotions
Start You Own Business
Host a workshop
Download Free Stampin' Up! Catalogs